As LED lighting continues to improve and grow in popularity, more and more manufacturers are utilizing them in larger scale products such as household appliances and cars. Unfortunately, many manufacturers take shortcuts when designing these parts, using poorly designed and built electronic components. Not only do these failed parts damage the reputation of LED lighting but they also create short term problems for the owners as they now must deal with partially broken products that could be expensive to fix.
 One of these types of issues has been identified in BMW models (2011-Present). The second generation BMW X3 F25 (years 2011-2017), like many other BMW models, added new style features to the high end mid-size SUV. One of these added features was LED lighting within the tail light assembly. Unfortunately, the BMW X3 LED tail lights have become notorious in failing as early as 60,000 miles after purchase. This issue has left many faithful BMW owners frustrated and looking for a solution.
BMW has a good warranty system and if under warranty, BMW will replace the whole tail light assembly…unfortunately there is a design flaw within the tail light system that will cause it to fail just like the first.
Here at LEDSupply we have a $6 part for this tail light repair. Follow the below guide to easily fix the BMW tail light by replacing the constant current driver. Below the guide check out exactly why this issue happened to understand how to troubleshoot other LED lighting issues.
7 Step DIY Guide to BMW LED Tail Light Repair
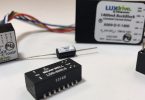
First you must purchase the LDD-500HW. Select wire connections and a 500mA output to get the correct model for this replacement.
Step 1: Take out the tail light assembly
Follow the below video for the first 4 minutes in order to easily remove the tail light.
Step 2: Locate the Valeo Board
This is the simple constant current driver for the LEDs is the issue within the tail light. The inefficient board heats up too much and causes a weak connection.
Step 3: Disconnect Valeo Board
Cut the wires at the start of the connector or 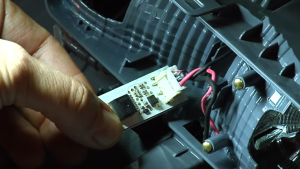 if you would like to try and reuse the connector un-clip it from the circuit board.
Some have used the connector by clipping the LDD driver wires and sliding them into the correct notches of the connector. They then finish it off with hot glue to make sure the wires do not fall out.
Step 4: Wire Connections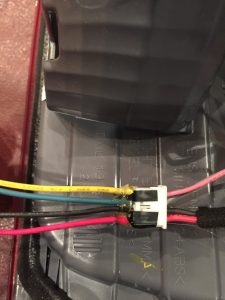
Whether you end up using the quick connector or cutting it off and soldering wires together, make sure the wires connect in the following order:
- Red Wire from LDD-500HW connects to Red on the connector
- Black Wire from LDD-500HW connects to Black Wire.
- Yellow Wire from LDD-500HW connects to Pink Wire.
- Blue Wire from LDD-500HW connects to Gray Wire.
- White Whire on LDD-500HW can be clipped down and taped off. This is for dimming and is not needed.
Step 5: Protect Wire Connections
Protect the connections you just made with heat shrink or electrical tape. This will ensure they are solid and nothing disrupts them. Use hot glue if you kept the connector on to ensure the wires do not disconnect.
Step 6: Mount LED driver within tail light
This can be a tight fit but the LDD-500HW will fit within the assembly. Place cockeyed where the Valeo board was originally or hot glue into place as pictured below.
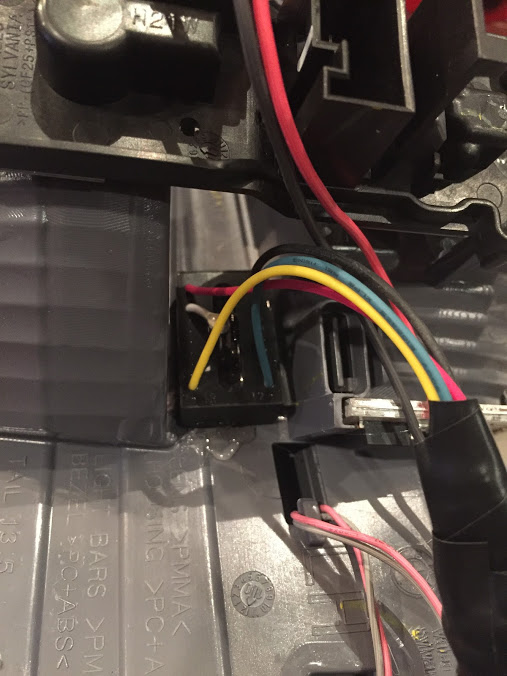
Step 7: Put Tail Light Back into Place
Connect the tail light and test the light before putting it all the way back into place. When you confirm it works put it back in and your BMW tail light is fixed.
Check out the problem with this tail light and why the LED tail light failed below.
The Issue: What is happening with the BMW LED tail light assembly?
Many X3 owners have noticed their tail light assemblies failing while still under warranty or even later at around 90,000 miles or so. The tail lights (left and right) seem to go out within months of each other or in some cases right around the same time.
The peculiar part about the issue is that some owners said the tail lights became dimmer over time before they went out completely. Other owners noted that after not driving the vehicle for some time, the lights would turn on upon startup before dimming and failing after a few minutes of use. This usually signals some sort of problem within the circuit, whether it be with a poor connection or heat issue causing the LEDs to dim and then fail.
Many took their vehicles to dealerships or mechanics to figure out the issue in which case they discovered the only option was to fix the whole assembly which is $250-300 per light!! Cars under warranty still would be covered but the issue would just come back up down the line as the replacements were the same factory built tail light assemblies. Finding a cheaper fix for this issue became a priority.
The Failure: What is causing the LED tail lights to fail over a short time?
The fact that the X3 tail lights became dimmer over time or intermittently working, leads us to believe that the LEDs themselves are fine and there is some internal component that is not working.
LEDs need a constant current source which should be built into any application that utilizes high power LEDs. That is usually the first place that we look when troubleshooting a circuitry issue. Within a car application like this, there should be a low voltage driver that will take the 12VDC input from the battery and then output a constant current, safe for the LEDs.
This VALEO board (pictured right) is the culprit built in the BMW X3 tail light assembly. This tail 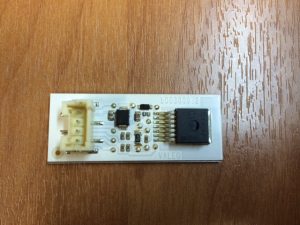 light circuit board has an on-board resistors that limit the current going to the LEDs. The power from the battery goes through this board before going to the LED tail lights themselves, making sure a safe, steady current is provided to the LEDs.
When troubleshooting the issue, many discovered that there was a bad (dry) solder joint on this board. It was believed that this was the issue and many owners discovered that by adding some solder to this joint and solidifying the connection with a solder iron solved the issue. All was working well for the owners until a few months down the road when the X3 tail lights failed a second time.
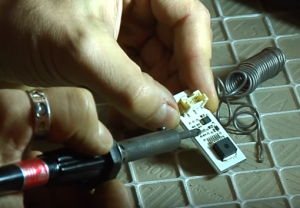 What many did not realize is that the solder joint only became ‘dry’ or lost connection because the board was under too much heat, causing the solder to crystallize and disconnect. This all adds up with why customers have had lights dimming slightly over time or why they will work after the BMW had been sitting for a while.
To sum it up, the overall issue is that this Valeo board is not efficient enough to run in this application. The heat within the tail light and the heat the board generates itself causes the connection(s) to fail and become useless over time. The loose connections obviously cut power to the light resulting in the failed tail light.
The Fix: Using a Mean Well LDD driver for the BMW tail light repair
By locating the bad component, we know what needs to be replaced in order to permanently solve this issue. As some discovered, re-soldering the connections on the board will solve the problem temporarily, but the area will heat up again over use and cause the circuit board to fail again in no time. To fix the tail light issue for good the Valeo board needs to be replaced by a more efficient LED driver to go in between the source power and the LEDs.
The solution was found by a very helpful BMW X3 owner. By researching the Valeo board and finding the value of the resistor, he found that it was just a simple constant current driver keeping the LEDs at a steady current of 500mA.
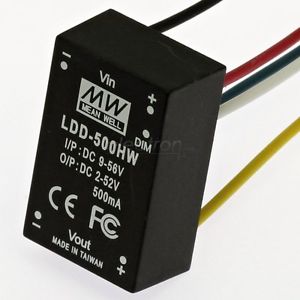 After finding the board specifications it was easy to find a replacement for the board in the Mean Well Low Voltage LDD Drivers. The LDD-500HW is a much more efficient driver than the Valeo board, fully potted to protect against dust and heat. At just $6 this is an amazing fix for this tail light issue that the dealer wants $300+ to fix.
Thanks a ton to the original BimmerFest forum discussing this issue particularly forum poster ‘Smovva’ for the recommendations.


